If you didn't already think I was a tree hugging hippie, with my (semi) organic gardening and composting, then this post probably proves it once and for all.
Granola has become one of the things I never buy in the grocery store. Especially once I realized how cheap I can make it on my own, how much more I get, and how I can control what goes in, or stays out.
Monday, October 24, 2011
Monday, September 26, 2011
Chicken Cutlets Topped with Bruschetta

My mom started making chicken this way, and it instantly became a family hit. Everyone loves it, plus it's crazy easy to make. I paired it with some green beans from the garden. For those, I like to boil for just a few minutes until tender, then shock them with cold water. Season with a squeeze of lemon, a touch of olive oil and salt and pepper. Simple and delicious!
Sunday, September 11, 2011
Fresh Salsa and Chips

It's a Sunday afternoon in September and that means you will find me cheering on my New York Giants football team. And that also means I'm doing some snacking.
Now obviously, most football snacks aren't that healthy, but this is one chip and dip you can munch on and not feel guilty about.
I got this salsa recipe from my former colleague, Ted Koppy, and I make it all the time! In addition to enjoying this salsa as part of your traditional Mexican fare, you can also add a spoonful to the top of some chicken cutlets or maybe even add a little to your cheese omelette.
Ingredients:
5 lbs plum tomatoes
2 tbsp kosher salt
a handful of green onion
1 tbsp oregano
3 tbsp parsley
4 cloves fresh garlic
2 tbsp cumin
1 tbsp fresh ground black pepper
2-3 jalapenos (depending on how hot you like)
Juice of one lemon
Combine all ingredients in cuisinart and pulse. If needed, strain extra juice and serve with nacho chips.
Monday, September 5, 2011
Saving your summer harvest
 I've got a ton of tomatoes, a Foodsaver, and an extra freezer, so what's a girl to do? Freeze them, of course!
 Many traditional gardeners may say canning is the only way to go, but I came up with the idea of freezing the tomatoes last year. I usually make a large pot of sauce and freeze those off in smaller portions, so why can't I do the same thing with just the tomatoes? So that's exactly what I did (and do).
Warning: I will tell you in advance that this is a messy process. Make sure you have on an old t-shirt and be prepared to wipe down your cabinets and counters when you're done.
I grow mainly plum tomatoes and they're really the best kind to use for my freezing method.
First, you want to bring a large stock pot of water to a boil. In a second large stock pot, put in cold water with a tray of ice cubes. When the water comes to a boil, add your tomatoes and turn off the heat. You only want them in there for about 30 seconds to a minute. We're not cooking the tomatoes, we just want to loosen their skin. Then you want to move the tomatoes from the hot to the cold water.
 From there, I set up my Cuisinart and a large pitcher to squeeze the seeds and skin into. Then it's just an assembly line. Take a tomato, pinch off the top, slide the skin off, and squeeze the seeds out. I've got it down to where I know just how many tomatoes it takes to fill the stock pot and subsequently, the Cuisinart.
 When the Cuisinart is full, pulse the tomatoes a few times, but not too much! Dump the contents into a Foodsaver and then the freezer. You'll be able to enjoy your harvest in the middle of the winter! Click here for Tomato and Bean Soup recipe.
Wednesday, August 24, 2011
Chicken and tomatoes over rice
My tomatoes are finally ready and ripening faster than Nick and I can eat. I would say I have about 20 tomato plants in my garden. Most of them are plum tomatoes, which contain less seeds and are good for making sauce. Plus, I find there's less of a chance of bugs and other problems happening with the smaller variety. My mother is growing some tomatoes on her patio, but they're huge and before she can even pick them they are spoiling. What a bummer! I did buy a few other tomato varieties (not sure what kind, sorry!) and they are a little bigger than the plum tomatores, but they're not the huge beefsteak variety.
With all the tomatoes on hand, I'm always trying to figure out how to incorporate them into dinner. For this dish, I also used some onions from my garden, as well as some of my herbs. The taste of summer!
Ingredients:
 12 chicken thighs, skin removed
1 tbsp butter
Parsley, basil and oregano, chopped
Heat the vegetable oil in a deep saute pan. Season the chicken with salt and pepper, dredge in flour and cook until brown on each side. Remove the chicken from the pan, add a pat of butter with the garlic and onions. Saute for a few minutes and add the wine or chicken broth. Let that simmer for about 2 minutes and then add the tomatoes. Simmer for another minute or two and then add the chicken back into the pan. Cover and simmer on low for about 20 minutes. Remove the cover and let cook for another 10 minutes. Mix in the herbs in the last minute. Serve over a bed of rice.
With all the tomatoes on hand, I'm always trying to figure out how to incorporate them into dinner. For this dish, I also used some onions from my garden, as well as some of my herbs. The taste of summer!
Ingredients:
 12 chicken thighs, skin removed
About 15 plum tomatoes, seeded and chopped
One small onion, diced
3 cloves of garlic, minced
1 c. white wine or chicken broth
1 c. white wine or chicken broth
Vegetable oil to coat pan
Flour to dredge the chicken1 tbsp butter
Parsley, basil and oregano, chopped
Heat the vegetable oil in a deep saute pan. Season the chicken with salt and pepper, dredge in flour and cook until brown on each side. Remove the chicken from the pan, add a pat of butter with the garlic and onions. Saute for a few minutes and add the wine or chicken broth. Let that simmer for about 2 minutes and then add the tomatoes. Simmer for another minute or two and then add the chicken back into the pan. Cover and simmer on low for about 20 minutes. Remove the cover and let cook for another 10 minutes. Mix in the herbs in the last minute. Serve over a bed of rice.
Wednesday, August 3, 2011
Summer pasta
Every time I wander into the garden, I am pleasantly surprised by all the progress. Whether it is the small fruit of the melon starting to take shape, or the weight of the tomatoes pulling the vines to the ground, I love taking it all in.
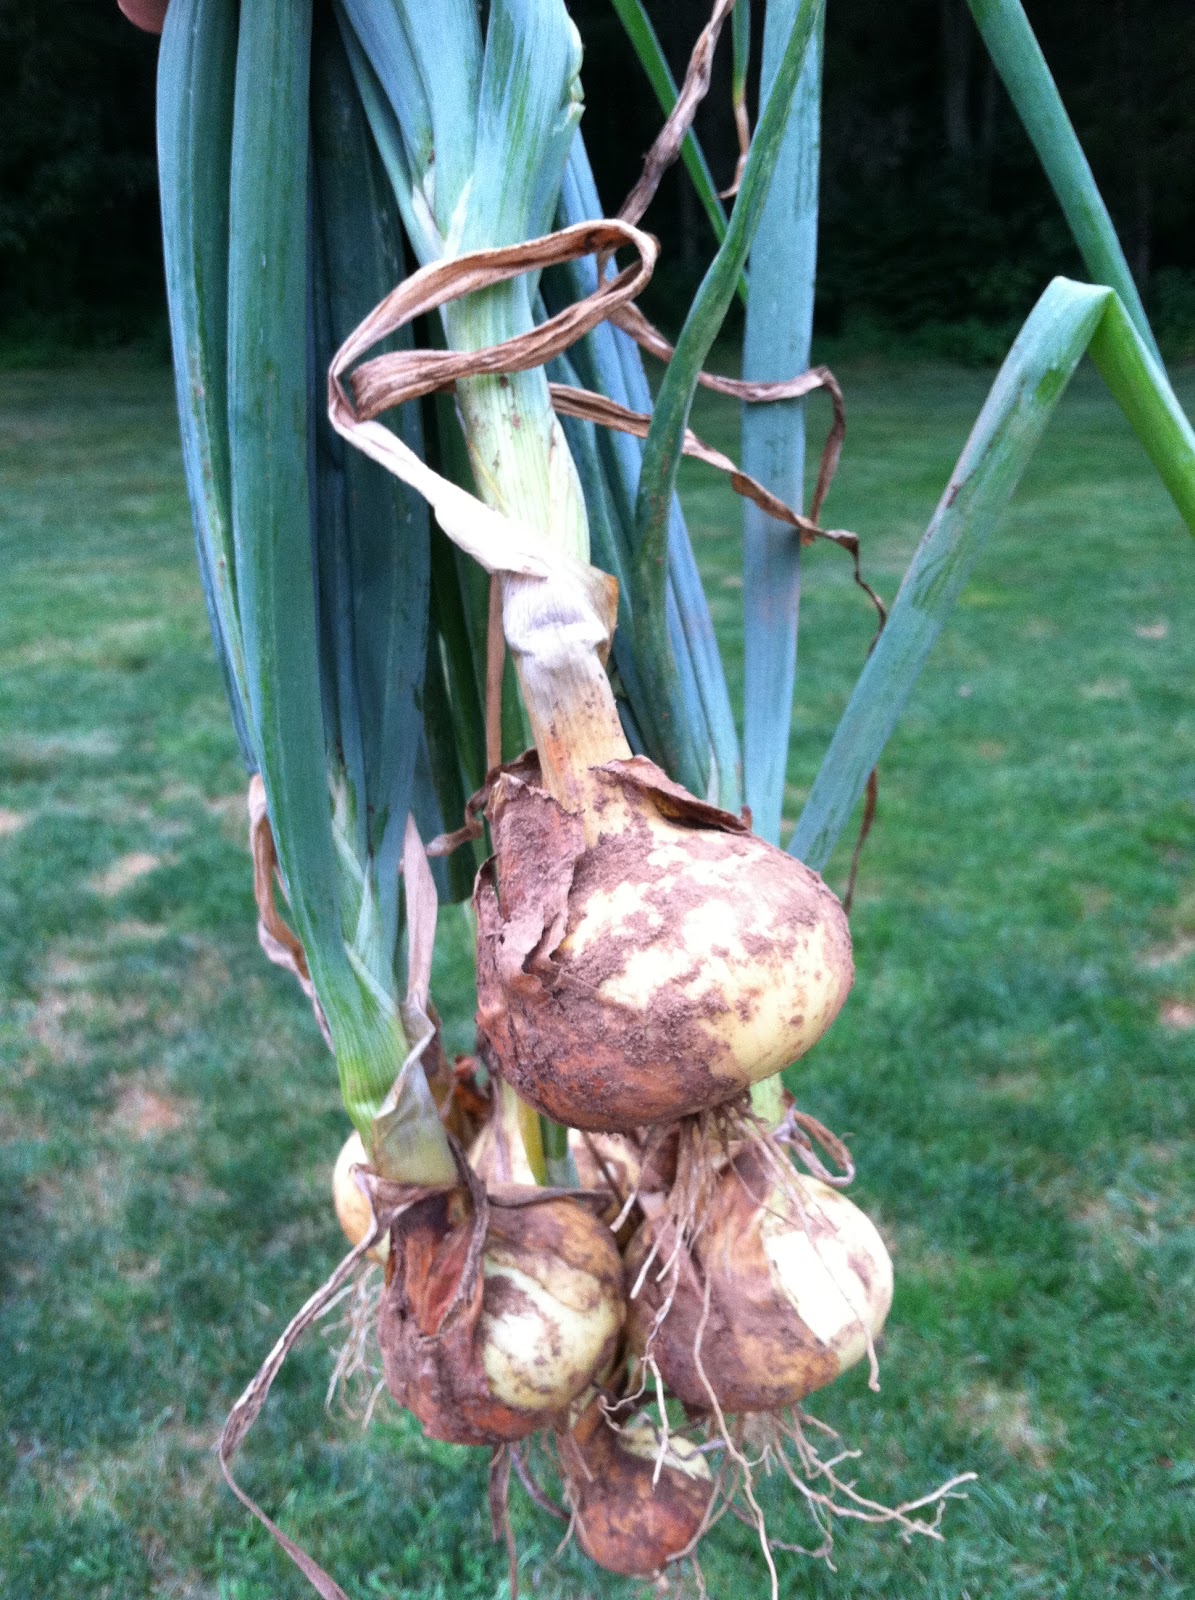
Today, I plucked another bushful of beans into my basket, twisted off some zucchini, squash and cucumber and then dug up a few onions.
 In the past, root vegetables like onions have not done well in my garden, or so I thought. And then I realized that I did it wrong in the past. The key is to make sure you have a nice mound of soil for the onions, potatoes, or carrots to grow into. Then, as they grow, you want to keep pushing up the soil around the vegetable. The tops usually start to die off when they're ready, but you can always just dig carefully around the vegetable before you pull it up to ensure that it is ready.
Once I had all my veggies, the eternal question arised: What's for dinner? I decided to make a quick pasta dish that has tons of flavor and is pretty good for you, too.
Summer pasta
1 lb pasta
enough olive oil to coat a large saute pan
1 small onion, diced
5 garlic cloves
1 c. diced zucchini
1 c. diced squash
a few hot cherry peppers, to taste
a few roasted red peppers
handful of fresh herbs (oregano, thyme, basil)
1 tbsp butter
Grated cheese
 While the pasta cooks, heat olive oil in pan. Add onions and garlic then squash, zucchini, cherry peppers, and red peppers. Cook until desired tenderness.
Before you drain the pasta, add about a cup of the pasta water to the pan. Add butter, pasta, herbs and grated cheese. Toss and serve.
Today, I plucked another bushful of beans into my basket, twisted off some zucchini, squash and cucumber and then dug up a few onions.
 In the past, root vegetables like onions have not done well in my garden, or so I thought. And then I realized that I did it wrong in the past. The key is to make sure you have a nice mound of soil for the onions, potatoes, or carrots to grow into. Then, as they grow, you want to keep pushing up the soil around the vegetable. The tops usually start to die off when they're ready, but you can always just dig carefully around the vegetable before you pull it up to ensure that it is ready.
 Once I had all my veggies, the eternal question arised: What's for dinner? I decided to make a quick pasta dish that has tons of flavor and is pretty good for you, too.
Summer pasta
1 lb pasta
enough olive oil to coat a large saute pan
1 small onion, diced
5 garlic cloves
1 c. diced zucchini
1 c. diced squash
a few hot cherry peppers, to taste
a few roasted red peppers
handful of fresh herbs (oregano, thyme, basil)
1 tbsp butter
Grated cheese
 While the pasta cooks, heat olive oil in pan. Add onions and garlic then squash, zucchini, cherry peppers, and red peppers. Cook until desired tenderness.
 Before you drain the pasta, add about a cup of the pasta water to the pan. Add butter, pasta, herbs and grated cheese. Toss and serve.
Wednesday, July 20, 2011
Summer Squash and Zucchini

Also in my colander are my green beans, which are at the peak of their harvest. That colander is pretty big and it's almost filled to the top with beans -- and that's just from one picking! I've been harvesting the beans for about two weeks now.

While Nick was getting dinner ready, I was cleaning, cutting, and freezing the other half of the zucchini, the squash and my green beans. If you don't have a Food Saver device, I recommend you go out and buy one immediately. Nearly everything that we don't eat right away gets vacuum sealed with the Food Saver. I can't tell you how much I enjoy eating veggies from my garden in March. The Food Saver is also great for freezing your meats, or in my house, Nick's catch o' the day.
Monday, July 18, 2011
Dinner party!
 |

 Also fresh on the menu was the green bean salad. After boiling the beans until slightly tender, I tossed them in a homemade vinaigrette which includes basil, balsamic vinegar, oil, diced onion, salt and pepper and a little bit of freshly grated pecorino-romano cheese. Yum!
The best part of the menu was that I was able to prepare everything the night before, which gave me more time to enjoy my company and my martini (s).
Monday, June 27, 2011
Captain Nick's Bass-erole

Captain Nick's Bass-erole
Ingredients:
1 box elbow macaroni
1 lb bass
1 can cream of cheese soup
1 small can evaporated milk
1 c. shredded sharp cheddar cheese
1 c. breadcrumbs (or crushed Ritz crackers, yum!)
hot cherry peppers, diced (more or less, depending on your heat preference
1 tsp Cajun seasoning
 Bring a large pot of water to a boil. Add macaroni to pot and then place strainer with fish above the boiling water. You essentially want to steam the fish, until flaky, as you cook the pasta. They both should done in about 8 minutes.
In large bowl combine bass, soup, milk, cherry peppers, Cajun seasoning and macaroni. Pour into greased casserole dish. Sprinkle cheese on top and then breadcrumbs. Dot with butter. Bake 20-30 minutes in 350-degree oven until bubbly.
Tuesday, June 21, 2011
Harvest Time!

 Also flourishing is my lettuce, though for some reason my other greens, the arugula and spinach, are not doing as well. I've been eating a lot of salads lately with my greens, with some of my radishes chopped and tossed in. I make a couple salads at one time, that way I can just grab and go in the morning before work.
I'm also happy to report that it seems the pesticides have worked and the cucumber beetles that were decimating my crops have moved on to greener pastures.
Tuesday, May 31, 2011
Peas, potatoes and pests
I'm happy to report some of my garden is flourishing, but unfortunately it is also under attack by the so-called cucumber beetle.
 First the good news. I'm attempting to grow potatoes for the first time this year and they are doing great! As you can see in the picture, they are already over a foot tall and growing more every day. As with all root vegetables, I always have a hard time figuring out when exactly I should pull them out of the ground.
 Also doing well are the Asian snap peas, which I'm also attempting for the first time. I'm quite proud of the trellis I built for them to grow up on. For all you who need instant gratification, peas are a good vegetable. They germinated in just a few days and have quickly grown to about two feet tall.
 I came out to do some weeding over the weekend and that's when I spotted my cucumber seedlings, totally eaten away. That's when I threw the idea of my organic garden right out of the window. This is war! The cucumber beetle can flourish in compost, which is exactly where I found the little mother bleepers.
 But the cucumber beetle doesn't just like cucumber, oh no, he also loves similar seedlings like melon (check), eggplant (check) and squash (check). They also seem to have a penchant for my radishes, which as you can see are also all chewed up.
So bring on the pesticides! I've been eating them for so long anyway, what's the difference?


So bring on the pesticides! I've been eating them for so long anyway, what's the difference?
Monday, May 23, 2011
Sun-dried tomato and arugula pasta

- 1 box whole wheat pasta, cooked al dente. (Reserve about a cup of pasta water)
- Olive oil, enough to thoroughly coat the bottom of your saute pan
- One small onion, chopped
- 5-6 garlic cloves, finely chopped
- One small jar of sun dried tomatoes, coarsely chopped
- 1/4 c. hot cherry peppers, coarsely chopped (more or less, depending how spicy you want to go!)
- 1 can white beans, rinsed and drained
- 1 tbsp Italian seasoning
- 1 tsp salt
- a few basil leaves, chopped
- 2 c. arugula, coarsely chopped
- 1 c. white wine
- 1 c. pasta water
- handful of freshly grated Pecorino-Romano cheese
- 3 tbsp butter
Before you drain the pasta, take about a cup of the pasta water and add to saute pan. Return the pasta back to its pot and toss with the butter and cheese. While the butter melts, stir in the arugula to the sun-dried tomato mixture. Combine the pasta mixture and sun-dried tomato mixture and toss well to coat. Plate your dishes and sprinkle the basil and a little more cheese on top.
Sunday, May 22, 2011
Strawberry crunch muffins

Topping:
1/2 c brown sugar
1/4 c flour
1/2 c chopped pecans
1/4 c oatmeal
3 tbsp butter, melted
Muffins:
1 1/2 c flour
1/2 c sugar
2 tsp baking powder
1/4 tsp salt
1 tsp cinnamon
1 egg, lightly beaten
1 stick butter, melted
1 tsp vanilla extract
1/2 c milk
1 c sliced strawberries
Combine all the ingredients for the topping and set aside.
In a separate bowl combine the ingredients for the muffins. Fold in the strawberries. Scoop mixture into muffin tins. Sprinkle the topping over the batter. Bake 20-25 minutes 350 degrees until a toothpick inserted in center muffin comes out clean.
Tuesday, May 17, 2011
All about herbs

Herbs are a wonderful addition to your garden, for many reasons. First, they are perennials, which means once you plant that basil, it will continue to come back, year after year, with essentially no work. Two, herbs are a natural insecticide. Their fragrant leaves repel pesks that can eat away at your tomatoes. For that reason, I have several bushes scattered throughout my garden. An oregano here, a rosemary there.

Which brings me to the best reason for growing herbs in your garden: the wonderful flavor they bring to your food. Parsley and oregano in homemade salsa -- delicious! Basil for your bruschetta -- mouthwatering! Rosemary chicken -- yum! The new motto in my house lately has been 'halt the salt'. Fresh herbs are a wonderful way to help cut your salt intake and add a flavorful punch to any dish.
Tuesday, May 3, 2011
Cute garden accessories!

Sunday, April 17, 2011
Cool weather crops
It's finally time to get planting! The ground is good and soft, the weather is getting warmer and it's time to get some seeds in the ground.
- radishes
- arugula
- lettuce
- spinach
- potatoes
- peas
 This is first time that I'll be growing peas and potatoes. I decided to go with the Asian snap peas; you can eat them raw or cooked, and you don't have to shell them like traditional peas. I just couldn't see myself spending the time to shell the regular peas. As for the potatoes, I bought the "special" potatoes at Agway where I bought my seeds this year. The guy at the store told me that they do differ from the potatoes you buy at the grocery store, but I'm not sure I'm buying that. I'm going to try and plant some regular potatoes from the store and see what happens. Either way, the method is the same: Quarter the potatoes and make sure they are buried under a good mound of soil. Each quarter should yield one potato. For the most part, because of my very rocky soil, root vegetables that take a long time to grow don't do very well in my garden, so we shall see...
Radishes are also a root veggie, but they grow very quickly. If you're turning up your nose at the thought of radishes, you really should give them a try. They add a nice crunch when sliced thin and tossed in your salad and are a really tasty addition to a stir-fry.
Remember when you're planting to pace yourself. You don't want to plant 10 rows of radishes or 8 rows of lettuce -- at least not all at once. The key to a vegetable garden is spreading out your crop so that you are not inundated with one type of veggie. For example, I planted two rows of peas last week, four potatoes and one row of everything else. Next week, I will repeat that and plant the same thing again. By the time the first batch is ready for harvest, it will be time to plant the warmer weather veggies, like cucs and squash.
Saturday, April 2, 2011
The joys of composting
Ok, composting is not really that joyful, but it can become an intregral part of your garden. It provides vital nutrients to your soil, plus it cuts down on your household waste.
I have several composting piles scattered throughout my garden, but I have a pretty big space, so you might only need one or two piles. I also have a spinning composting bin, but there's really no need to go out and get one. I find the piles are the most efficient, because composting requires three things: air, water and time.
So what can you compost? Well, basically anything that comes from the earth, can go back to the earth - it really is the circle of life! This includes your paper products, like your junk mail, paper towels, and napkins. But beware-I learned the hard way not to just throw all my junk mail into the compost. I'm still picking those pesky plastic envelope windows out of my garden. And I'm always amazed on how long those things stick around, because guess what? Plastic does not break down! It's an eye-opening lesson on plastic and how we really need to do our part to reduce our use of plastic. But I digress...
Food products like coffee grinds and egg shells are wonderful composting ingredients. You can also add a layer of grass clippings or leaves to your compost pile periodically. And of course, any of your garden clippings or old plants. That's how I wound up with so many compost piles now - As I was cleaning up at the end of last season, I put those old plants into my compost.
But what should NOT be composted? Meats and oils are a big no-no. That's what will attract the animals to your compost.
So what's the best method? I have found that small layers work best. I would start with a layer of paper products (minus any plastic!) and then place food products on top, adding any grass clippings or leaves. Then cover it lightly with a bit of soil from your garden. I like to keep a plastic container with a lid on the kitchen counter for any kitchen waste so that I can add it to the compost piles whenever it gets full and I tend to cover it with a little soil each time. AS it begins to break down, you can start to pull the rich compost material from the bottom.
Remember, just like when you're growing, the most important thing you need is time and patience when composting.
Saturday, February 5, 2011
Starting your seedlings
My cousin Katie recently asked my opinion about when she should start her seedlings inside, and I thought my response would make for a perfect blog post.
My preference is NOT to start inside. It's time consuming, messy and you have to keep monitoring the seedlings for water. Plus, once spring hits you can't just stick them in the ground. Seedlings are fragile and will a need time to adjust to the outside elements and a lot end up dying because they can't make the adjustment.
I tried starting my seedlings inside one year and I found those plants didn't grow that much bigger or quicker than the seeds I just stuck in the ground.
So for my money, and sanity, just wait for spring! Hopefully it will be here soon.
Monday, January 24, 2011
Gram's Anisette Cookies

For my wedding shower, my Aunt Sandi laminated dozens of my Gram's cookie recipes. I just love pulling down my recipe box and looking at her neat, cursive handwriting, appreciating the little tips and tricks she noted in the margins. And for a short time we are together again...
Ingredients:
For the cookies
1/2 c. Butter
1 tsp baking soda
1 1/2 tsp. Anise extract
1/4 tsp salt
1 c. Sugar
2 eggs
2 1/4 c. Flour
1 tsp. Cream of tartar
For the topping:
1 c. Confectioner sugar
2 tbsp butter
3 tbsp milk
Food coloring optional
Cream butter and sugar. Add anise extract, baking soda, salt and cream of tartar. Mix in eggs. Slowly mix in flour. Drop batter by teaspoon onto ungreased cookie sheet. Bake 10 minutes in 350 degree oven. Do NOT let cookies brown. Let cool.
To make topping combine confectioner's sugar, butter, food coloring and milk on stovetop. Heat and whisk until smooth, only about 3 minutes. Dip cooled cookies in mixture.
Sunday, January 16, 2011
Tomato and Bean Soup

I can't believe that it is the middle of the winter and I'm still enjoying veggies from my garden! Instead of canning my veggies, I've opted to freeze them. It's a great alternative, especially if you have a Food Saver and the freezer space. I used up the last of the tomatoes and string beans from last season's crop for this recipe. Is it spring yet?
Ingredients:
1/2 onion, diced
1 tsp olive oil
1/2 green pepper, chopped
2-3 celery stalks, chopped
2-3 carrots, chopped
2-3 cloves of garlic, minced
3 cups diced tomatoes
2 cups water
Sprinkle of oregano and basil
Pinch of cumin
Salt and pepper, to taste
1 can white beans
1 cup cut green beans
Directions:
In large soup pan, cook onion in oil on low heat for about 5 minutes. Add celery, carrot, pepper, and garlic and cook another 3-4 minutes.
Add tomatoes, water, oregano, basil, cumin, salt and pepper. Cover and cook over low heat about 10 minutes, or until veggies are tender.
Add string beans and white beans. Add additional salt and pepper, if necessary. Cover and cook additional 10 minutes, or until string beans are tender.
Saturday, January 15, 2011
Becky's Biscotti

Ingredients:
1 cup butter
1 1/2 cup sugar
4 eggs
2 tsp vanilla
1 tsp almond extract
4 cups flour
3 tsp baking powder
1/2 tsp salt
1 cup macadamia nuts, chopped
1 cup white chocolate chips
Preheat oven to 325 degrees. Line cookie sheet with parchment paper or spray with cooking oil.
Cream butter and sugar. Add vanilla, almond extract and eggs.
In a separate bowl mix flour, baking powder and salt. Slowly add to wet ingredients. Fold in nuts and chips.
Divide dough into four equal parts and form each quarter into loaves, about 1 1/2 inch thick, about 14 inches long.
Bake 20-25 minutes until lightly brown. Let cool and then cut 1/2 inch pieces diagonally. Put back in oven for another 8-10 minutes until golden brown.
Welcome!
Yes, it is the dead of winter but I've already have gardening on my mind. I love gardening, obviously, but this blog is also about the food that I prepare using ingredients fresh from the ground. There is nothing more satisfying than seeing the wonderful food that you have grown yourself being enjoyed by friends and family.
Subscribe to:
Comments (Atom)